Showing posts with label Recipes. Show all posts

Monday, August 24, 2015

Cinnamon Swirl Raisin Bread

Cinnamon Raisin bread holds a special place in my heart...

My mom would buy the Pepperidge Farm kind as a "Special" bread. 

We would always eat the loaf so quickly and yearn for her to buy another....

Now as an adult and mom myself, I have bought the Pepperidge Farm kind maybe twice. But each time I do, it transports me back to being a kid again. 

So I was super excited when I found this recipe to make one similar in my beloved bread maker that I received last Christmas. 

It's super easy to make the dough and the only labor is to roll out the door and prep it with the cinnamon/sugar mix and the roll it tight before putting into loaf pan... 

But the results are delicious.... AND it's pretty to look at.... 

I know that most people don't have a bread machine, but I think you should get one just to make this bread. 

It would be SO worth every penny spent....


INGREDIENTS: 

1 large egg, room temperature plus
1⁄4 cup milk
3⁄4 cup water
1⁄4 cup softened butter
1⁄3 cup sugar
1 teaspoon salt
3 1⁄2 cups bread flour
2 teaspoons active dry yeast

1⁄2 cup raisins

1⁄3 cup butter, melted and cooled
1⁄3 cup sugar
3 teaspoons cinnamon

1 egg white

1 1⁄2 teaspoons sugar

DIRECTIONS

Add milk and egg into bread machine pan
Add water
Add the softened butter, 1/3 cup sugar, salt, bread flour and yeast.
Set bread machine to dough cycle.
Add raisins at the beep.
Remove the dough at the end of the dough cycle.
Roll dough to 10x12 rectangle.
Brush egg white on surface of dough.
Brush with melted butter.
Combine cinnamon and sugar.
Sprinkle over dough; leaving about 1 inch on each edge.
Roll from short side.
Pinch where it meets and roll ends under.
Place in loaf pan.
Cover with cloth and let rise for about an hour.
Preheat oven to 350 degrees.
Once the dough has risen, brush top with egg white and sprinkle with 1 1/2 teaspoon sugar.
Bake at 350 for about 35 minutes.


Have a Sweet Day!!!


READ MORE ...

Sunday, June 14, 2015

Brown Butter M&M Cookies


M&M and Chocolate Chip cookies are my ultimate weakness. 


Sometimes I find that a Chocolate-with-Chocolate Cookie is a bit too much, so I prefer the complex flavors that go into a vanilla based cookie with some Chocolate in it...

Don't get me wrong, there is Definitely a time and place for an ALL Chocolate cookie, but I like the sweetness with the slight salty that comes from a Vanilla based cookie with chips or M&M's. 

Which reminds me... I should also try this recipe with other varieties of M&M's: 
Pretzel M&M's
Mint M&M's
Peanut M&M's may be a little too much for a cookie unless you chop them up into pieces first. 

Anyhoo....    

Saw this beautiful cookie being on Facebook and knew that I needed to try it out. 

Ashley from 'Baker By Nature" http://bakerbynature.com/ did a terrific post back in December about these cookies. She made them in traditional M&M colors and also in the Red and Green Xmas M&M's. The pictures on her site made my mouth water, so I decided to give them a try. Stop by and see her pictures for these cookies. Absolutely Gorgeous!  

This was the first time I Browned Butter for any recipe and was a bit intimidated and a bit nervous. I love the way it gave the cookie a little something extra and have since Browned Butter for another recipe... Thx Ashley!!! 

I made my cookies with the Spring-colored M&M's and I think they turned out great!

Enjoy! 


 The original blog post, with recipe, can be found here: http://bakerbynature.com/brown-butter-mm-cookies/

I have also conveniently copied it for you here straight from her blog: 

Brown Butter M&M Cookies
Ingredients
  • 2 1/2 cups all-purpose flour
  • 1 teaspoon baking soda
  • 1/4 teaspoon flaky sea salt
  • 16 tablespoons (2 sticks; 8 ounces) salted butter, one stick melted until browned
  • 1 cup + 2 tablespoons dark brown sugar
  • 1/2 cup granulated sugar
  • 2 teaspoons vanilla
  • 2 large eggs, at room temperature
  • 2 1/2 cups m&m's
Instructions
  1. Preheat oven to 375 degrees (F).
  2. Line 2 large baking sheets with parchment paper and set aside. In a medium sized bowl whisk together the flour, baking soda, and sea salt; set aside.
  3. Place 8 tablespoons of butter in a small sauce pan over medium-high heat and cook for about 2 minutes – stirring almost constantly – until the butter has browned. Remove from heat and stir in remaining butter; whisk until completely smooth. Place the bowl in the refrigerator or freezer and bring the butter back to room temperature. *You’ll know the butter is at room temperature when you press a finger into the top and it makes a slight indentation.
  4. Once the butter is at room temperature…
  5. Add the sugars and the vanilla to the browned butter and whisk until light and fluffy; about 2 minutes (you may use a standmixer/ handheld mixer to help if you have one). Add the eggs and beat quickly – for only about 30 seconds – until they’re just combined. Let the mixture rest for 5 minutes, then beat the eggs for another 30 seconds. Gently fold in the flour mixture with a wooden spoon, stirring only until the flour begins to disappear. Fold in m&m's.
  6. Roll 3 tablespoon sized balls of dough between your palms to form a ball (they should be big; almost a 1/4 cup), then place on prepared sheet (make sure to leave enough room in between each cookie for inevitable spreading). Continue this process until all the dough has been rolled. Place baking sheets in preheated oven and bake for 11-13 minutes, or until golden at the edges but still soft in the middle. Press additional m&m's on top of the cookies right after removing the pan from the oven, if desired.
  7. Let cookies cool for 5 minutes on the sheet before transferring to a wire wrack to cool completely.

READ MORE ...

Sunday, April 5, 2015

Butter Pecan Cake with Salted Caramel Frosting

Happy Easter Everyone!!!! 

The way this cake came about is because my husband is a BIG fan of Butter Pecan. It's one of the only ice creams flavors that we always have in our freezer, besides Chocolate, of course ;-)

So when I saw a Butter Pecan flavor in a boxed cake, I was thrilled!!! 

I then started to think of frosting flavors and decided to try the Salted Caramel Frosting I had just seen on the website: Sally's Baking Addiction

She is one of my favorite bloggers and her book is my dream come true. Pretty, colorful and the recipes are Oh So Gooood!!!!!


Upon baking the cake, my kitchen smelled divine! I was very excited to see how the whole thing would turn out. 

I baked the cake according to the package and then proceeded to make the frosting. 

After the cake was chilled and leveled, I stacked the cake and added the delicious frosting. 
I drizzled some more caramel on top of the frosted cake and also added some crushed pretzels for texture. 

The results were amazing....


SALTED CARAMEL FROSTING


  • 1/2 cup (1 stick) salted butter
  • 1 cup packed dark brown sugar
  • 1/3 cup heavy cream
  • 1/4 tsp salt
  • 2-3 cups powdered sugar, sifted
  • 20 pretzel twists, optional

Directions:

Melt the butter in a small saucepan over low heat. Once melted, add brown sugar and heavy cream. Stir constantly over medium heat until sugar is dissolved. Add salt. Allow to bubble for exactly 2 minutes. Remove from heat and allow to cool. Beat in powdered sugar 1 cup at a time, until you reach desired consistency.
Make this cake... It's divine!!!!


READ MORE ...

Monday, February 9, 2015

Chocolate Snickerdoodle Cake

What is your favorite Chocolate combination?????

Mine are: 

  • Chocolate with Raspberries
  • Chocolate with Cinnamon
  • Chocolate with Strawberries
  • Chocolate with Mint
  • Chocolate with chocolate.....

For this Pre-Valentine's Day Dessert, I wanted to try something new. 

And, boy, Did I....


This cake is deliciously Moist, Decadent and So delicious...

The blend of Cinnamon in the chocolate cake and in the frosting make it something special. 


After crumb coating the cake and working with the frosting, I decided to put Chocolate Sprinkles on the bottom portion of the cake instead of trying to make a fancy design. 

Those who know me know that I have not mastered a smooth buttercream, so I am always looking for alternative methods of decorating a cake. 

 
To add a little texture to the top of the cake, I decided to use a spoon in order to add peaks to the top. 


Once cut, this cake was to Die For....


If you like Chocolate, then this cake is for you...

Enjoy!!!!


Chocolate Snickerdoodle Cake
- Adapted From: The Cake Doctor Chocolate Cookbook
Ingredients
  • 1 package plain chocolate cake mix
  • ¾ cup milk
  • ¾ cup canola oil
  • 1 Milk Chocolate Hershey Bar, Melted
  • 3 large eggs or 3/4 cup Egg Beater
  • 2 teaspoons ground cinnamon
  • 1 teaspoon vanilla extract
  • For frosting: 
  • 8 tablespoons (1 stick) butter, at room temperature
  • 8 Tablespoons boiling water
  • ½ cup unsweetened cocoa powder
  • 1 teaspoon ground cinnamon
  • 1 teaspoon vanilla extract
  • 4 cups confectioners's sugar
  • Dark chocolate candy bar for grating on top (optional)
Instructions
  1. Preheat oven to 350 degrees. Grease two 9" pans and set aside.
  2. Place the cake mix, oil, eggs, cinnamon, and vanilla in a large mixing bowl and blend for three minutes, or until well-blended. Add melted chocolate. Mix well
  3. Pour evenly into two pans, smoothing with spatula.
  4. Bake for 28-32 minutes or until the cake springs back when lightly pressed with your finger. Remove and allow to cool for ten minutes. Remove from pans & then cool for another 30 minutes.
  5. Place the cocoa powder and boiling water in mixing bowl. Blend until combined. Add butter, cinnamon, and confectioners sugar, and finally vanilla. Blend until combined and icing looks fluffy. Add an additional ¼-1/2 cup confectioners' sugar if needed.
  6. Ice cake and press chocolate sprinkles if you desire.  

READ MORE ...

Saturday, January 31, 2015

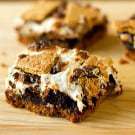
S'mores Brownies

Crazy is as Crazy does....

In this case, Is it crazy to put the ingredients from a s'more into a brownie???
Crazy, huh????

But in this case it works!!!!!

I find myself always thumbing through Facebook, looking for the newest and greatest recipes. As others share Youtube videos and pictures of their pet snakes, I look for recipes. 

It's quite the obsession. 

I sometimes feel that if I don't check for recipes a million times a day, I will miss out on the next best thing to bake...

So it was with great excitement that I stumbled on the Brown Eyed Baker and found this absolutely PERFECT recipe for S'mores Brownies!!!! PERFECT, I say! 

My daughter, once again, is a S'mores Fanatic so this recipe was right up her alley...

It combines a Graham Cracker Crust with Chewy Brownies and a Marshmallow layer with several Graham Crackers smushed on top....


Absolutely Perfect!!!! 

The Original Recipe and Post can be found here: S'mores Brownies

It takes a little elbow grease to make these, but it is soooo worth it! 


   S'mores Brownies

yield: 32 brownies
 
prep time: 30 minutes
 
cook time: About 45 minutes
 
total time: 1 hour 15 minutes

INGREDIENTS:

For the Graham Cracker Crust:
3 cups graham cracker crumbs
¼ cup granulated sugar
¼ teaspoon salt
¾ cup unsalted butter, melted
For the Brownies:
1 box of Brownie Mix
1 bag mini marshmallows
Additional graham crackers, broken into pieces

DIRECTIONS:

1. Preheat oven to 350 degrees F. Butter a 9x13-inch baking pan. Line the pan with foil, leaving some overhang, and then butter the foil; set aside.
2. Combine the graham cracker crumbs, sugar and salt, mixing well. Add the melted butter and, using a fork, toss until the entire mixture is moist. Dump the graham cracker mixture into the prepared baking pan, pressing it into an even layer. Bake for about 15 minutes, or until golden brown.
3. Meanwhile, prepare your brownie recipe. Pour the brownie batter over the cooked graham cracker crust, spreading it into an even layer. Bake the brownies according to the directions.
4. As soon as the brownies come out of the oven, switch the oven to broil. Pour the bag of mini marshmallows onto the brownies, covering it in an even layer. Pop the pan back in the oven for a few minutes. Keep a close eye on them - you want them to start to char so you get that s'mores flavor, but don't want to completely burn them.
5. As soon as the pan comes out of the oven, top the marshmallow layer with the pieces of graham cracker, pressing down slightly so that the pieces of graham cracker get nestled into the marshmallow.
6. Cool completely and then cut into squares. Store at room temperature in an airtight container.


Enjoy!!!!


READ MORE ...

Friday, January 30, 2015

Red Velvet Box Cake Cookies

I bet you didn't know that you could make delicious, quick and easy cookies from a Box Cake Mix!!! 

I hadn't either... Until, I stumbled across a wonderful post and recipe by one of my favorite Bloggers: 
I am Baker.

You too can follow her blog and look at all her wonderful recipes on: Iambaker.net

My daughter is a HUGE Red Velvet cake person. I mean HUGE, so I decided to make the recipe featured on 'I am Baker's' Blog for Devil Food Cake Cookies into Red Velvet Cake Cookies!!! 

I wasn't sure if the recipe would translate the same, but I was pretty confident it would turn out okay. 

Here they are prepared and being packaged up individually for a school event....


They are moist and somewhat chewy and the extra sprinkle of powdered sugar made all the difference. 


Just the right amount of sweetness...

I am baker uses Devil's Food Cake Mix in the Original Recipe, but trust me, you can use any Cake Mix you have on hand. The possibilities are endless....

Original Recipe and Blog Post can be found here: Devil Food Cake Cookies

I omitted the Chocolate Chips in the Red Velvet Version....

Enjoy!!!!!!

Triple Chocolate Devils Food Cookies
Ingredients
  • 1 box Devils Food Cake Mix
  • 1/2 cup oil
  • 2 eggs
  • 3/4 cup White Chocolate Chips
  • 1/4 cup Milk Chocolate Chips
Instructions
  1. Pour dry ingredients into medium bowl.
  2. Add oil and eggs and mix until well combined.
  3. Stir in all chips.
  4. Using a small ice cream scoop or tablespoon, scoop out small balls of dough. This recipe makes 18-24 cookies, so I had three cookies sheets prepared.
  5. Place eight dough balls on each cookie sheet. (If you would prefer a smoother appearance for your cookie, go back and roll each cookie between your hands.)
  6. Bake at 350 for 8-10 minutes

READ MORE ...

Sunday, August 17, 2014

Chocolate Peanut Butter Marble Cake

Happy 'Almost Back to School' Time....

As many of you know and some not too aware, my family is a blended one (6 children in total) and when August comes around every year, I panic slightly and am mostly happy that the children go back to school. 

I will miss them, trust me, but I also like to get back into the routine of my life. Summer flew by this year, though, and I felt we did not get nearly enough crossed of our Summer Bucket List.

That said, the twins (15 years old) came up to stay with us these past 2 weeks before school starts up again for them. We missed them so much this summer and were not able to celebrate their birthdays with them, in July, so we had a Belated Birthday celebration.  

When thinking of a new cake flavor, I wanted to combine some favorite household flavors and make a truly special cake. So, I went to my trusty recipe Book.... The Cake Doctor!!! 
How'd you guess??? 

What I came up with was a: "Chocolate Peanut Butter Marbled Cake"!

It combines all the flavors everyone loves so that no one felt left out...


I love the way this cake came out. It is very pretty without being frilly and girlie, especially since the cake was for two boys. The swirls added an interesting element to the cake. It was absolutely delicious!!!!

Although the recipe calls for a 9x13 pan, I opted to make a 9 in layer cake with a layer of chocolate frosting in between, so that it would be more festive. I also added peanuts on top in order to add a slight crunch to the cake.

CHOCOLATE PEANUT BUTTER MARBLE CAKE


  1. Place a rack in the center of the oven and preheat the oven to 350°F. Lightly mist a 9 by 9–inch metal cake pan with vegetable oil spray, then dust it with flour. Shake out the excess flour and set the pan aside.
  2. Place the cake mix, peanut butter, oil, eggs, vanilla, and 1⅓ cups of water in a large mixing bowl and beat with an electric mixer on low speed until blended, 30 seconds. Stop the machine and scrape down the side of the bowl with a rubber spatula. Increase the mixer speed to medium and beat for 2 minutes longer, scraping down the side of the bowl again if needed. The batter should be well blended.
  3. Measure out 1½ cups of the cake batter and place it in a medium-size bowl. Set the bowl aside. Pour the remaining batter into the prepared cake pans, smoothing the top with the rubber spatula.
  4. Make the chocolate marble by stirring the cocoa powder, confectioners’ sugar, butter, and 2 tablespoons of warm water into the reserved 1½ cups of cake batter until well combined. Spoon tablespoon-size dollops of this mixture on top of the peanut butter batter. Swirl with a knife to marble the cake, but be careful not to touch the bottom of the pan. Place the pan in the oven.
  5. Bake the cake until the top springs back when lightly pressed with a finger, 30 to 35 minutes. Transfer the cake pan to a wire rack and let the cake cool.

 Recipe adapted from The Cake Doctor Returns Recipe


READ MORE ...
Blog Design by Delicious Design Studio